Pages

Wednesday, October 12, 2011

Eat your heart out Starbucks...I'm saving my $4!

Pumpkin Spice Lattes.
Glorious.
Sweet Perfection.
Horrifically expensive.

So, I researched pumpkin spice syrups, found a boat load of options and then tweaked them all a little to come up with this:

Melt 1 cup of sugar with 1 1/2 cups of water over low/medium heat until sugar dissolves.
Whisk in:
1 Tbsp cinnamon
1 1/5 tsp nutmeg
1 1/5 tsp ginger
1 tsp vanilla extract
3 tsp canned pumpkin

Cook over low/medium heat, whisking constantly for 3-5 minutes. Do not let it get to boiling point, and do not overcook it. This bad boy will turn in to a gelatinous mess of pumpkin goo if you do.
After you cook it let it rest for 5 minutes then begin straining (waiting longer and allowing it to fully cool with make it harder to strain).
I highly recommend using cheese cloth and straining in to a glass measuring cup where you can let it cool the remainder of the way before transferring to whatever container you're going to store it in.
Unfortunately I did not have cheesecloth. The don't-want-to-leave-the-house-to-buy-a-necessary-element-of-the-recipe version is this:

Yes, that is a paper towel masking taped to my measuring cup. No, I do not recommend it. It takes forever and the paper towel clogs easily to you have to keep spooning it out or replacing it.
That said, it still came out beautiful, smells delicious, and this will be an addition to my coffee tomorrow morning. Annnnnd probably almost every morning until December, when I will switch it to gingerbread syrup.

Tuesday, October 11, 2011

Drawing a blank!

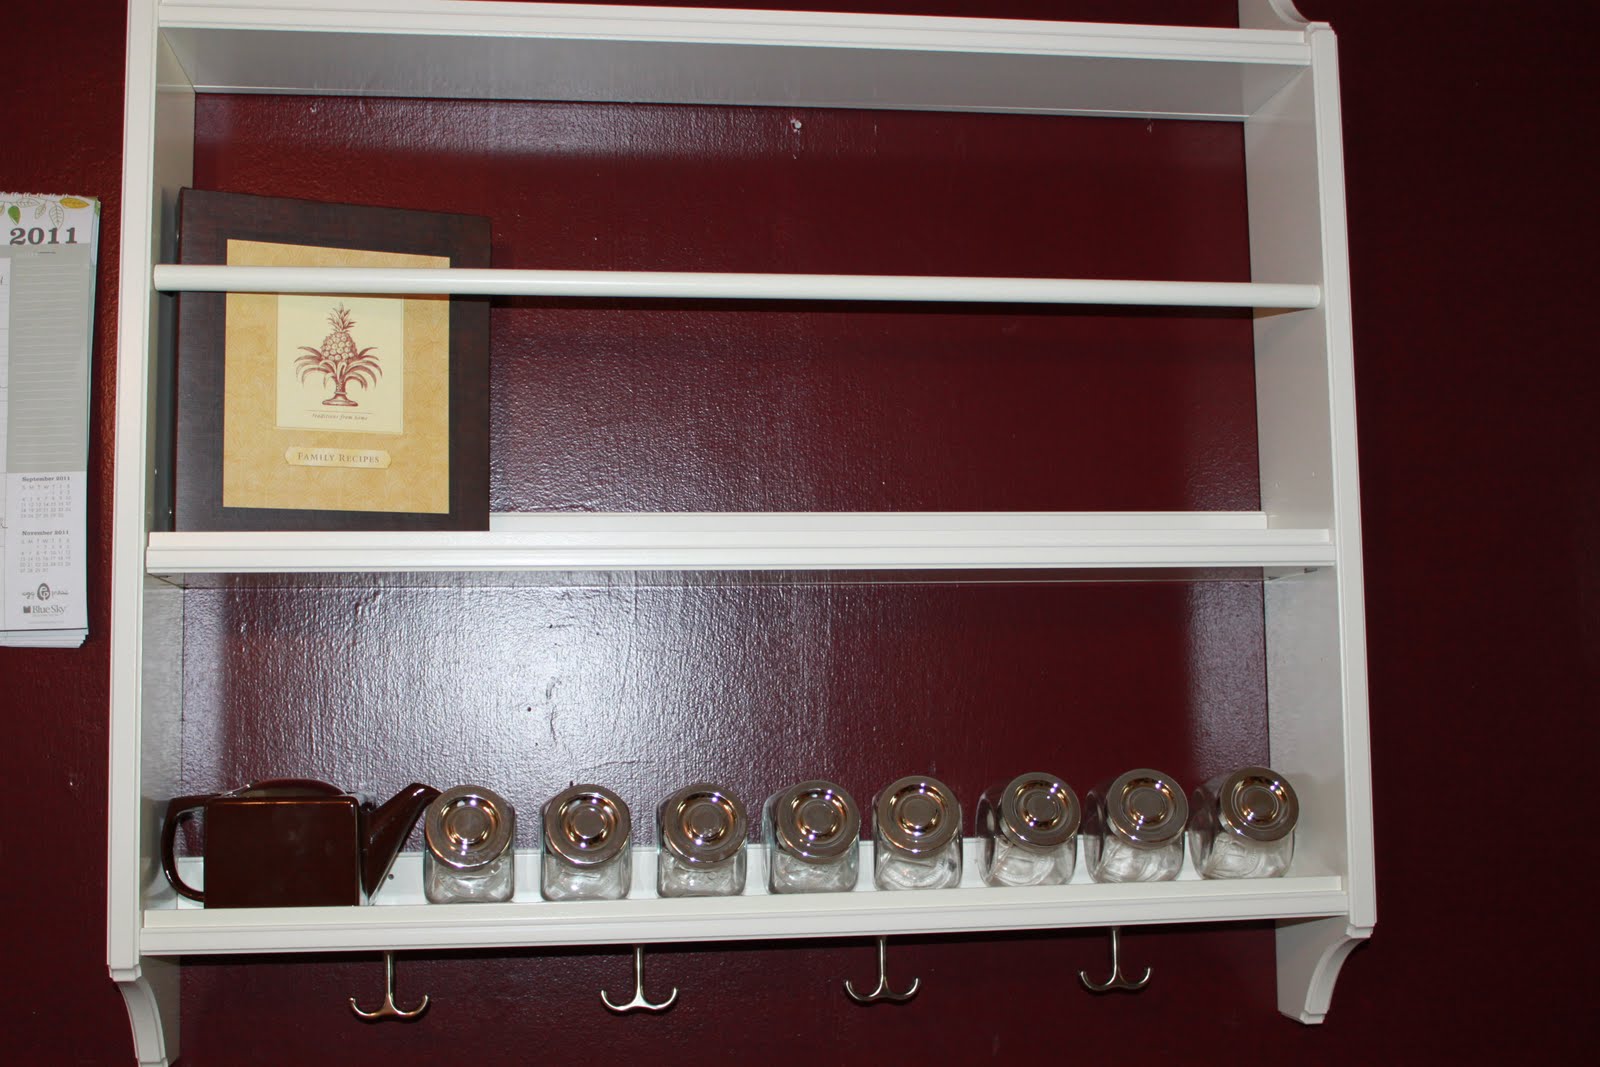
So on a "just looking" trip through IKEA on Saturday the husbando spotted an awesome find for the wall in our kitchen.
We've been wanting something a little more "country" but also functional because we have nearly zero cabinet and counter space.
So we came home with this, which we both really like:

Wow my wall is not that shiny in real life FYI.
The problem is that now I'm drawing a total blank on what to put in it. I like the little spice jars and intend to actually transfer my spices to them probably tomorrow.
I know that I want to hang mismatched vintage tea cups from the hooks (plan on asking my grampa what he has laying around this weekend), but other than that I literally have no ideas.
Do I put some of my big platters in the plate section?
Jars of dry goods like rice?
A goldfish?
Help!

Monday, October 10, 2011

It was the best of times, it was the worst of times

Tonight's dinner was decidedly divided.
First, the good news, homemade honey mustard makes a wonderful "wet" portion of a dredge for turkey cutlets.
Just mix up 1/8 cup of honey, 1/4 cup of Dijon mustard and a splash of heavy cream, and use in place of eggs before coating the cutlets in breadcrumbs. I highly recommend a whisk for this because the honey is a little resistant to co-mingling.
I baked the turkey cutlets at 375 for 10 minutes (they were super thin), and they came out crispy and delicious.
Now for the bad news.
I thought I was having a moment of inspired genius. With one potato left in the house I decided, creamy yogurt potatoes, that's what I want for a side dish. I add plain yogurt to mashed potatoes and its delicious, I bake Tandoori chicken in plain yogurt with spices, why not combine the two?
So I confidently stirred the diced potato, about a cup of plain yogurt, scallions and parsley together. I loaded it in to a dish and put it in the oven with the cutlets.
Horrendous.
The yogurt did this weird separation thing, the parsley was totally overwhelming, and the whole thing was just a mess. So in to the trash it went:
My husband was even a good sport enough to try closing his eyes, thinking maybe the visual was making it worse, but alas.
You can't win them all!

Sunday, October 9, 2011

Shoe Rescue

Ever have a pair of shoes that just never seem to work?
I bought these delightful red patent leather, peep toe, big platform beauties about 4 years ago. I was convinced that I was going to wear these with every outfit in my closet.
I've worn them twice.
Why? Because I can't reconcile the shiny patent red and the much more casual wooden heel and platform. Every time I go to put them on with a casual outfit I think "The shiny red is too dressy", and every time I go to wear them with a dressy outfit I think "Wow, the wooden heel really makes this too casual".
We were therefore at an impasse.
Until I thought of two key ingredients that could make these shoes fabulous:
1. Mod Podge
2. Glitter
Because truly, what can't Mod Podge and Glitter solve? WWIII, I'm going to suggest a glitter party.
I taped the shoes off with painters tape to keep clean lines:
Then I mixed a little bit of glitter in with the Mod Podge to give it some weight, used a fine paintbrush to paint a layer of Mod Podge on and liberally sprinkled with super fine glitter. I recommend springing for the fashion glitter, it's super fine and durable.
Please note that while this is a super cheap way to fancy up a pair of shoes it makes a MASSIVE mess. Though I suppose for one learned in the glitter arts it may not get as ugly:
And so I haven't cleaned off the excess glitter yet because they're still drying and I don't want to disturb them but this is basically how they look, expect an outfit post soon!
All those glitter scientists out there, I was thinking I should spray these with a decoupage sealant....thoughts on that? What should I use?

Saturday, October 8, 2011

Culinary Delights

Today was a day of culinary delights, and though I don't have any pictures, I can't refrain from bragging. Because 2 of the 3 meals I ate today were cooked by SOMEONE ELSE! This is a virtually unheard of occurrence.
A delicious broccoli and garlic omelette made by the husbando, OUT for dinner which is such a rare event that it feels like a solar eclipse, and ice cream at Peaceful Meadows.
I'm not thrilled with my eating decisions today because I strive to be healthy and I had a bit of a weight gain situation since I was in several wedding this summer that inevitably involved lots of good food and drinking. However, I'm trying to be far more reasonable about this.
I know that one day of indulging myself is not going to cause a 5 pound weight gain, and I have to lighten up a little!

So, Im' going to embrace that mentality and go pop open a Dogfish Head 120 Minute IPA.
The only beer more glorious than their 90 minute IPA.

Friday, October 7, 2011

Old yoga mat gathering dust?

Ok, I am in the kitchen constantly.
Not just because I have to, between dishes, and two year old snack times (aka every 15 minutes), but because I love to.
I love to bake bread, knead it by hand, spend time slowly whisking a homemade pudding, delicately chopping vegetables for stew, all of it is delightfully satisfying to me.
So naturally I've been lusting over those kitchen gel mats that I see everywhere, in Better Homes and Gardens, running rampant on Food Network, they just look so delicious for my feet and back.
But reality check, they are $60 for a teeny one and that's just not a realistic purchase for my household right now.
Therefore I bring you the equally fantastic and squishy option: Using an old yoga mat.
Whether you're a faithful yogini who has an old mat lying around with a few tears that you can't seem to part with, or someone who thought they were going to do yoga and never got in to it I know MANY people with yoga mats that are collecting dust in the living room right now.
You know who you are.
I had this wonderful pilates mat that had a tear in it but for some reason I couldn't bring myself to throw away, now I know why.
Step 1: Take your kitchen mat
Step 2: Lay your kitchen mat over your unused yoga mat and trace it
Step 3: Cut out the shape, minus about 1/4" so the yoga mat is slightly smaller than your kitchen mat
Step 4: Lay your kitchen mat over a neutral fabric, trace and cut it out to the same size
Step 5: Sew the kitchen mat and your extra fabric together, right sides facing each other (you're basically making a pillow case for your yoga mat)
Step 6: Turn right-sides out and insert yoga mat
There it is, a super cheap alternative that is equally squishy and delightful for your feet and back!
A few tips:
1.This is a pilates mat so it's about 3/4" thick, if you're using a standard yoga mat I would just cut two pieces out and stack them inside the pillow case.
2. I used a stretchy material on the back so that the mat would easily slide in, if you don't have a stretchy fabric just cut it about 1/4" larger than your kitchen mat so you're not fighting to shove the yoga mat inside.
3. I sewed a piece of rubber kitchen shelf liner to the back of the mat cover so it wouldn't slip when I stood on it, if your fabric is slippery I recommend the same.

Enjoy!

Thursday, October 6, 2011

Roasted Butternut Squash and Apple Soup...Fall Goodness

Everything great about autumn rolled in to one delicious soup (if I do say so myself).
There are many versions of this out there, this one is a Frankenstein of my favorite soups, plus some of my own touches.
Please note, that while I am normally obsessive about buying ingredients in the least expensive way, I refuse to cut a butternut squash because frankly my knives aren't sharp enough and I like all of my limbs so I spring for the pre-cut stuff.
Also, I think that the quality of your ingredients is key, I'm addicted to the apple cider from Honey Pot Hill Farms in Stow, MA and I cannot recommend it enough. It is unpasturized so it only lasts a week, which was part of the inspiration for this soup.
Enjoy!

Ingredients:
1 package of cubed butternut squash
Olive Oil for coating
2 Tbsp butter
1 small yellow onion, diced
2 normal sized apples (only 1 if it's the size of a softball), diced
1 cup apple cider
32 ounces vegetable broth
1 Tbsp red wine vinegar
Sour Cream to garnish

Preheat your oven to 375, coat butternut squash with olive oil, sprinkle with salt
Roast for 30 minutes
When done remove from oven and set aside
Melt butter over medium heat (you could brown the butter but I inevitable burn so I didn't)
When butter is melted add onion and cook for 5 minutes stirring occasionally
Add apple and cook an additional 3 minutes
Stir in butternut squash and apple cider
Let simmer for 5 minutes
Add vegetable broth and splash of vinegar
Bring to a boil, then turn heat to low, cover and cook an additional 8-10 minutes
Puree soup with a handheld mixer or in batches in a food processor
Serve with sour cream, add about a tablespoon to each cup of soup (don't overdo it on the sour cream or you'll kill it, but don't omit this or you'll have too sweet of a soup, hows that for directions?)
I served mine with focaccia from King Arthur Flour's website (more on this at a later date). The recipe can be found here, the only change I made was subbing 1/3 of the AP flour for bread flour. It's the first time I've made this recipe and I will definitely be repeating it. In fact, I will be using the leftovers to make pizza tomorrow night!
PS My 2 year old daughter loved this recipe and kept calling it apple sauce soup, so it's a multi-generational hit!